Gear Review: G Form Elbow Pads

Elbow pads are that piece of gear that you never really think you need until you smack the crap out of your elbow. For me, it’s usually my boat that I hit my elbows on and more when I’m playboating than anything else. I started wearing elbow pads when I started creek boating. It seemed like a good idea. Honestly, I wore them mostly to try and prevent putting holes in my dry suit. For a couple years I tried a couple different pads that never stayed where I wanted them. I managed to put three holes in the elbows of my dry suit all while wearing elbow pads, so they weren’t protecting me or my suit. Eventually I just gave up on them all together. Sometimes people would ask me why I wasn’t wearing elbow pads or they would offer me their spares, assuming I had just forgotten mine. I took a few hits over time that had made me fearful I could have really damaged something and certainly made me rethink my no elbow pad philosophy. I just didn’t see the point though. Even if I had pads on they wouldn’t have been on my elbow where I got hit at the moment when I needed them. They never stay in place.

IMG_1178

Well, I think I have finally found the solution. G Form elbow pads. I just got some and so far they are the pads elbow pads I’ve ever worn. I put them on against my bare skin under whatever other layers I might be wearing. They are stretchy and comfortable. They have a grippy rubber around the inside of the arm opening that helps keep them from sliding down (similar to the leg openings on bike shorts). They are super comfortable. The first time I wore them on the river I completely forgot I was wearing them. When I took my gear off at the end of the day I was actually surprised to find them on my arms. They are that unrestrictive. I haven’t taken a hard hit with them yet, but I did run around elbowing rocks and trees. I think they are going to do great when I need them. I can at least be sure that they will be on my elbows and not my wrists when I need them. If you’re tired of elbow pads that don’t stay put I’d recommend checking them out.

Advertisement
Posted in Uncategorized | Leave a comment

Five Reasons to Stop Buying Your Gear From the Internet

More and more it seems everyone I know orders their kayak gear off the internet. It’s not just kayak gear. People buy everything online these days. I’m surprised to see that there are still stores that you can walk into. I’m not sure what they are for really. I don’t know how much longer it will be until there are no more stores and we just order everything from our computers. Who wants to go outside anyway?

Why should you buy your gear from your local kayak shop instead of ordering it online?

  1. The people who work in your local shop are part of your local river community. They paddle the same rivers you do. You might even paddle with them. By getting your gear from them you are keeping your friends employed.
  2. When you buy gear from your local shop you have a person to go back to if you have any problems. Let’s say you order a kayak from the internet and you need help setting up the outfitting. Is the internet going to help you?
  3. Kayaking is not just a sport. It’s a lifestyle. Hanging out in your local shop is a great way to get to know other paddlers in your area. When you’re looking for a new boat, paddle, or whatever else, talking to the other people in the store is a great way to get the scoop on what gear is working well for people and what gear people have not been so stoked on. Sure you can read reviews online but do you know who wrote them? If you talk to the staff and customers in a shop you can actually get to know a person and understand their personal experience which lends some context to the review they might give. Plus, you get the added bonus of talking face to face to a real live person. Remember when people used to do that?
  4. Kayak shops usually have info on upcoming events in the area. Just stopping in once in a while is an easy way to keep current on festivals, competitions, community gatherings, clean ups, etc. in your area.
  5. Try before you buy. Sure most companies have fit guides on their websites but I prefer to know something is going to fit before I buy it. Suppose you’re looking for a new drysuit. If you follow the size guide and order online you still run the risk of not quite having the right fit when your suit arrives. Then you have to send it back and wait even longer. Wouldn’t it be better to walk into the store, try the suit on and be able to wear it on the river the next day? What if you’re looking for a boat? Everyone wants to demo new kayaks before buying one. You can’t do that if you order your kayak from the internet. Sure you could demo from your local shop and then order online, but do you really want that on your karma next time you head out to the river?
Posted in Uncategorized | Tagged , , , | 4 Comments

2015 Tobin Race: Stoked to not Win

The title might sound confusing. That’s ok. I meant it to. In this article I want to talk a little about competitive mindset and how I measure success in competition. Last weekend was the Feather River Festival and the Tobin Down River Race. This festival and this race have been a favorite event of mine for several years now. This year was the biggest and best yet and only slightly different for me in the race. This year was the first year that I decided that I was not only going to race but I was going to win the race. I decided this months ago really. I spent the summer getting into the best paddling shape I’ve been in for several years. I know the race course as well as anybody, and better than most. I have the fastest boat under 9ft that exists today. I went into this race with all the right parts to win it and I felt confident that I could. Well, I didn’t win, but I’ve never been so excited to lose.

pyranha 9R

I took off out of the start and from the first stroke until the last I paddled as hard as I could. I took the fastest lines I knew all the way down and made only a couple minor mistakes. I finished with a time of 15:19. About 40 seconds off the winner. You might be wondering why I’m so excited about my performance even though I didn’t win. Here’s why. Even though I didn’t win I did put down the fastest time I’ve ever had in this race. I had the best race run I’ve ever had in this race. I went 100% all out for the entire race and placed higher than I ever have before. I put it all on the water and I have no regrets. For me, competing is about beating myself. When it matters can I put down a the best run I know I can?  If I do that then I can go home super stoked with my results. It doesn’t matter if I’m first or last. If ran my very best race then I am stoked to do that. I love racing and I’d like to see more people getting into it at all levels. Sometimes though I think people shy away because they think, “I’m not going to win.” It doesn’t have to be about beating the other racers. It can just be about showing yourself that you can make it to the finish. It can just be about being there as one part of the whole. I think competition adds to our camaraderie and sense of community, as long as we can all not let ourselves take it too seriously. Don’t get so hung up on the rankings at the end that you forget how fun it was to be out there on your own paddling as fast as you could down that race course. Get out there and do the best you can and be proud of that.  This time my best wasn’t enough to claim the victory but that’s ok. I’ll be faster next time. Till then, see you on the river.

Pete

Posted in Uncategorized | Leave a comment

2015 Feather River Festival Highlight Reel

This is a short highlight reel of some runs on the NF Feather at last weekends festival. I’m working on a write up with photos that will be up soon. In the meantime check out some funs lines on the river.

Posted in Uncategorized | Leave a comment

Stay Calm, and Paddle On

A few days ago while perched on my photo rock at Hospital Bar on the South Fork American river, I had an encounter with a paddler stuck in the catcher’s mitt that got me thinking a little about how we react when things go less than ideal on the river.

If you’re not familiar with the south fork, the catcher’s mitt is comprised of an undercut rock and a couple other rocks that are strategically placed to create a less than ideal place to go. Rafts get stuck here frequently and kayakers from time to time as well. It is less than ideal and sometimes results in scrapes and bruises but under normal circumstances I wouldn’t consider it life threatening.

It was close to the end of the day for me when two paddlers came through the rapid and both flipped in the hole. They both rolled up but one of them took a little too long and wound up in the mitt. She was under the undercut with the point of the rock more or less over her spray skirt. Definitely less than an ideal place to be, but her head was above water and she was stable. I climbed down to the water from my perch to lend her a hand. When I got down to her she seemed a little freaked out. (Understandable. I don’t like being stuck when kayaking either.) “What do I do,” she asked me. “Take a deep breath and try to relax. You’re going to be ok,” was my first instruction. I then talked her through how I was going to pull her free and line her up with the exit and send her on her way. That went just fine and I hope she had an enjoyable rest of her day on the river.

Things don’t always go to plan on the river, but most of the time there is a simple remedy. I guess the moral of the story I’m trying to tell here is this, if your head is above water and you’re stable, you’re ok. I know it is hard to remember in that moment but if you can, take a few deep breaths, relax, and evaluate your options. Often times you’ll find your situation is less dire than you may have thought at first and you can avoid making it worse.

Remember, it takes experience to get good at handling things when they go wrong. If they never go wrong you can’t get that experience. Breath, relax, and have fun out there.

Posted in Uncategorized | Leave a comment

Racing California’s Cherry Creek

The Cherry Creek Race

Class V endurance racing. That’s what the Cherry Creek Race is. There are several class V kayak races that happen around the country each year. Each of them pose their own challenges to the racers. None of them require the competitors to paddle all out for 40 minutes through stacked class V rapids like the Cherry Creek Race does.

kayak

I first learned about the Cherry Creek Race in 2010 when I went to the creek for the first time. I just happened to show up on race day completely unaware that there was going to be a race. Since then it has been one of my favorite river parties to attend each year, and it has been a goal of mine to enter the race. This year it finally came together. I started making regular trips down there about a month ago to learn the course. Before last month I hadn’t been on that section of river in three years and I’d only done it a couple times, so I definitely had some work to do. After a half dozen practice runs I felt pretty confident. I drove down Friday night and felt really excited that I was finally going to race the creek. I wasn’t nervous at all which I thought was odd. I usually get pre-race jitters on even small races and this was definitely one of the hardest races I’ve done.  I woke up early Saturday morning and still felt fired up. The whole drive up to put in I couldn’t wait to get on the water. When we arrived at put in, that’s when my jitters found me. I was suddenly feeling pretty glad I had eaten a light breakfast as it was threatening to come back up. I talked myself through checking all my gear for any last minute issues. It was all solid. I felt confident, and just a little nauseous.  My goals for the race were pretty simple. First, make it to the finish line. Second, don’t get passed by the person behind me. Third, get there in under 45 minutes. Winning the race was not really a factor since my competition had way better knowledge of the course than I did. This really helped take some of the stress off too I think. Since it was my first time racing I just needed to create a base line. Next year I will be trying to beat my own time.

I was near the end of the group to start. I left the start at a strong but moderate pace. It’s easy to get caught up in the people cheering and want to go full throttle out of the gate, but when you have to paddle 5 miles through several really big rapids it’s good to pace yourself. The first mile is continuous class IV+ boulder gardens. It’s easy to get lost in here because there are few standout features. It all kind of looks the same. I managed to find my way only taking one wrong line but I don’t think it cost me too much.

The first big rapid is called Jawbone. You boogie down through some bouldery lead in until you come to a horizon where you ride a small curler in between two big holes. For me it’s about 50/50 if I get through here right side up. Nailed it in the race. One down. Ten more to go.

Cherry Creek

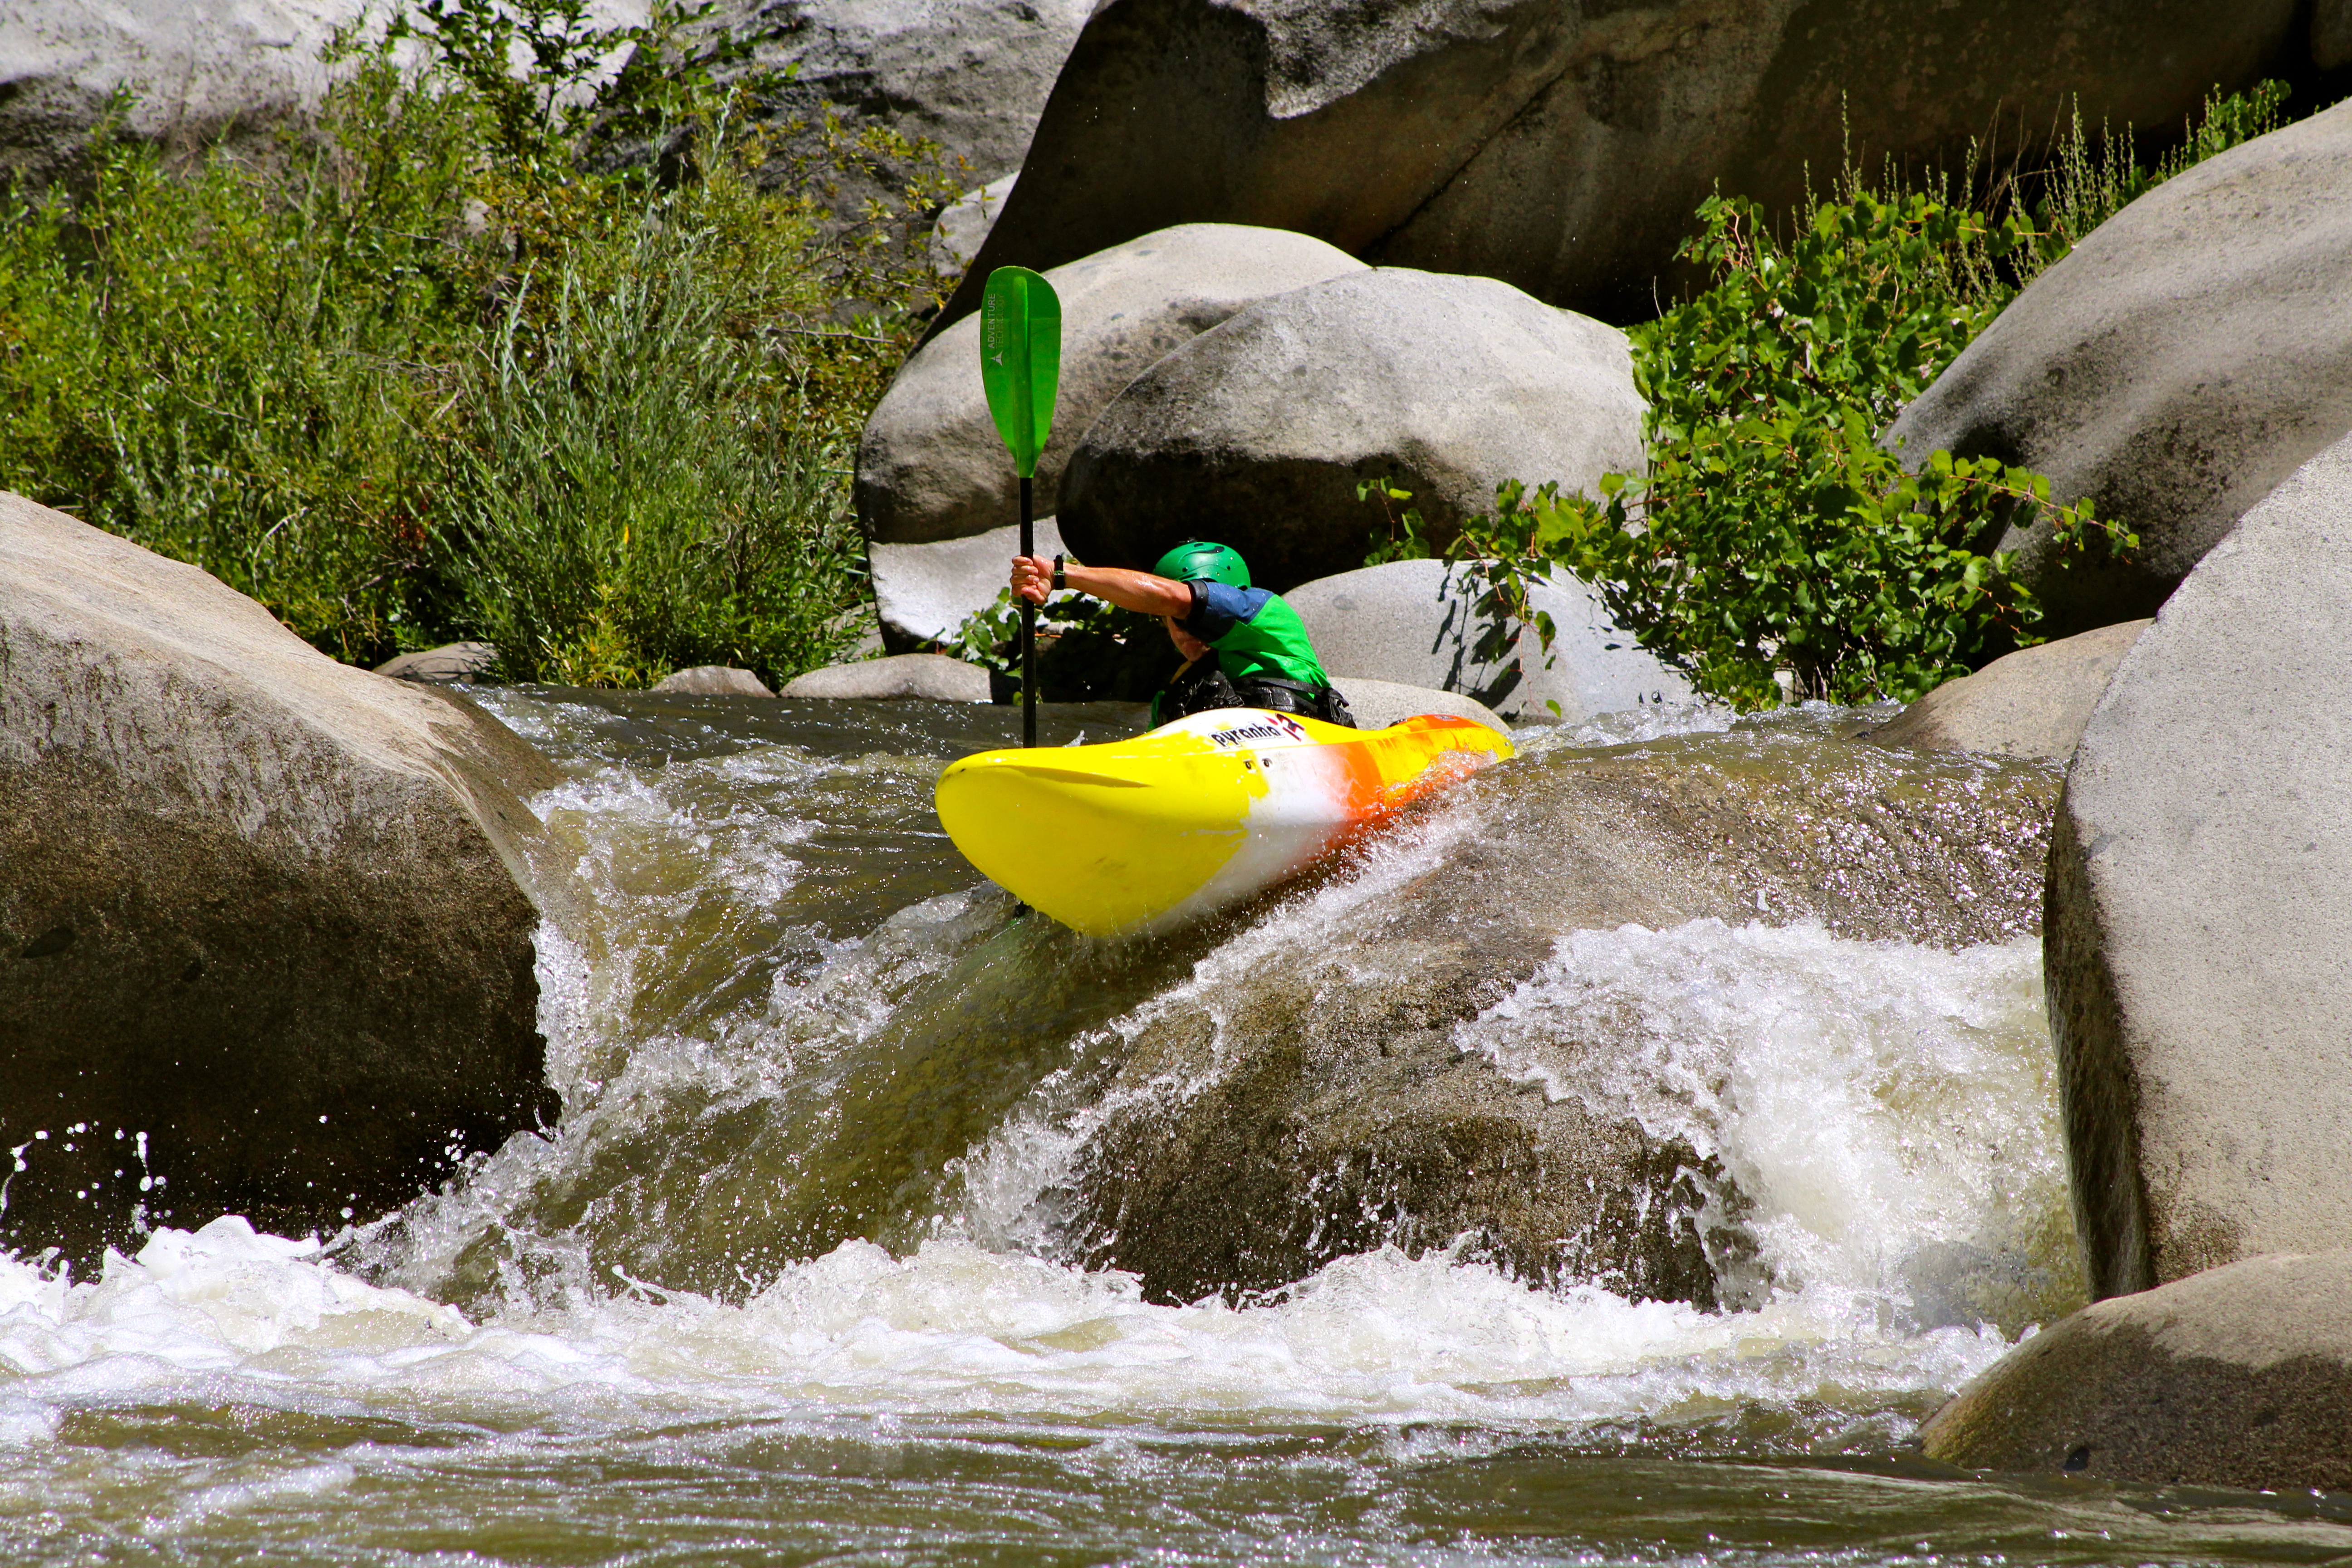
The author punching the final hole in Mushroom

Mushroom had been giving me some sporty lines in practice so I wasn’t sure what to expect in the race. I stuck both entrance moves but still got a little jangled up in the weird water in the middle. I recovered it though and flew off the top of the mushroom. I got surfed by the lateral at the bottom but was happy to avoid the big hole. I might have lost a couple seconds there but at least I didn’t get beat down and swim.

I never actually ran mushroom straight into toadstool before the race. Usually we stop in between to regroup and wait for everyone to get through the first part. There was nobody to wait for on race day though. It was pretty much the same going straight in although I did think for a second how it would be nice to stop for a breather. I got spun out in the eddy at toadstool which cost me time and energy but other wise it went well.

Unknown, Blind Faith, and Sky King all went really well. I was feeling pretty good at this point. I caught pretty good air at Sky King and the cheers of the safety crew fed my stoke to paddle harder. Then I got to Eulogy. Usually you drive up a pillow and boof to the right. Starting to feel the effects of the race I got rejected by the pillow. Being too right too early ran me into some dry rocks which nearly flipped me. I was hanging on a brace when I fell into the hole which surfed me to the right. Luckily it spit me out. However, it spit me out into a lateral which typewritered me the the left where another lateral took me all the way back to the right. Not the fastest way to get there but I did want to be right at the bottom so I guess that worked out. I was pretty out of breath from my surf session though so I had to slow down for Coffin Rock. You make a right to left move here right in front of a bad place to hang out so it’s important not to blow it. I just focused on the exit and catching my breath through here which cost me a little more time but like I said before, my first goal was to make it to the finish.

cherry creek race

The typical regroup and catch your breath eddy after Mushroom on a non-race run.

Feeling recuperated after Coffin I knew I had a really fun boogie section before Christmas hole, which was the last spot I was really worried about. I was feeling strong coming into Christmas hole and then I spotted the rafts. There are commercial raft trips on this section and race day is no different. I knew there was a trip out that day, but I was hoping not to see them. I had to slow down a bit to get through a tight section behind the raft before being able to power past them in the final lead in to Christmas hole. I wasn’t stoked to lose more time here but I was happy to know that at least if I got punished in Christmas hole a raft would be along to push me out.

With the raft trip now behind me and only two rapids to go I put everything I had left into each paddle stroke. I had no trouble at Richard’s hole and nailed the fast lines in the little slide things right after. Excited with the knowledge that I was going to make it to the finish I raced toward Lewis’ Leap the final rapid. At the top of the rapid you come around a blind corner into what’s known as the hallway. As I came around the rock I found one more raft. This one was wrapped and completely blocking the channel. My heart sank. This was not only going to kill my race, there was no where for me to go but right into it. For a split second I thought I was completely screwed. Then I hear, “you’re good, you’re good!” I look up and see someone on the rock above the raft pointing to tell me there was in fact a clear path around the raft. The race was back on. I rounded the raft, made the turn, nailed the entry boof and headed straight for the goal posts. As I flew off the leap I thought,”I made it. It’s done.”

I made it to the finish line. I didn’t get passed. I came in at just over 41 minutes. Pretty happy with my first Cherry Creek Race. I would have liked to have been faster, but that will be my goal for next year. I know where I made mistakes and I am looking forward to cleaning them up next time. I’m really lucky to have had a 9R for this race. Without it I would have been much slower. For me being new to this type of racing I found the fast hull on the 9R made it really easy to keep a good pace across what flats there were which allowed me a chance to slow my heart rate and catch my breath in between the big rapids.

Cherry Creek Race

Flying off the boof in the middle of Lumsden Falls in my 9R

Photos courtesy of Jen Musick and Phillip Schoenhoff

Posted in Uncategorized | Tagged , , , , | Leave a comment

Gear Review: Immersion Research Dry Wear

Immersion Research Dry Wear

7 figure dry top

Most companies that make kayaking gear today started out as a group of people making gear in someone’s garage. They were kayakers who wanted a better piece of gear for themselves and their friends to use. They cared deeply about making the best product possible because they were going to entrust not only their own lives to their product but also the lives of their friends. Over the natural course of time those companies grew into the businesses we know and love today. They are the companies that make the tools that allow us to pursue our passion on the water but did they lose something along the way? Sometimes I get the impression that our paddling companies may be forgetting their roots. Sometimes it seems that profits and the bottom line are what is driving decisions and policies at these companies. That may be the norm for other industries but in paddle sports we are just too small. I need a product designed, manufactured, and sold by people who know first hand what I am going to do with it. I want a product that embodies the spirit of the river and embraces the lifestyle that goes along with it. What happened to those companies? Immersion Research is still one of those companies in many ways. In more ways perhaps than any other. They are a small company based in Confluence Pennsylvania. The people who work there are paddlers who are just as stoked to squeeze in an early morning  paddle before work as the rest of us are. They know first hand what our gear needs to be able to do and stand up to. They live the river lifestyle and they still care very much about making the best possible piece of gear, not only for their customers but for themselves and their friends.

IR Double Stitched Outer Gasket

immersion research over gasketI have been wearing an Immersion Research  dry suit & dry top for a couple months now and there are a few features that really stand out to me. The first is this double stitch thing they do with their neoprene outer gaskets. At first I didn’t know what it was for. I just thought it looked kinda weird, but I soon realized it is very functional. As you probably already know, the sun is one of the biggest killers of latex gaskets. Every other company that sells dry tops & dry suits  uses something to cover the latex gaskets. IR is the first that I have seen to use this approach, and it is the first that I have seen that actually works. The extra stitch ensures that the latex gasket stays covered all day. I have been wearing this gear every day since March (about 5 months now) and I have not once seen my gaskets exposed to the sun. This superior sun protection will ensure that your gaskets last longer and keep you drier.

 Plastic Dry Suit Zipper

IR dry suit zipperIf you you’ve had the same dry suit for a few seasons and you have one with a metal zipper you are probably familiar with wrestling your zipper open or closed. For me it was always the relief zipper. Didn’t seem to matter how often I cleaned it or how much of that zipper lube I used. When I really needed to get it open it was almost a two person job. With the plastic zippers on my Immersion Research dry suit I’m finding I don’t have to ask my friends for awkward favors any more. The zippers slide smoothly and are just as water tight as the metal ones. Another bonus is, if you are wearing your suit in salt water, you don’t have to worry about corrosion on the plastic.   IR offers both a front and a rear zip dry suit. Whatever your preference, IR has you covered.

Latex Dry Suit Socks

dry suit socksPrior to getting an Immersion Research dry suit, I had seen latex socks on suits but never worn them. I had some reservations about them since I typically always had to replace my gaskets every year. (I wear my dry gear almost every day.) I was worried that these too would break down at the rate of the other latex components. I haven’t had my IR dry suit long enough to know how that is going to play out but I have found one unexpected plus to these socks over the other style. The are comfortable. Since they are latex they stretch and conform to your foot when you put them on much like any other sock would. They then fit inside your creek shoes without having all the extra material bunched up beside your toes and on the sides of your feet. I definitely prefer these for comfort over the fabric ones. The latex socks come standard on the Arch Rival dry suit but you can custom order either sock on the 7 Figure or Arch Rival suit.

IR Dry Suits and Tops Fit!

7 figure Dry topI started kayaking in 1997. Coincidentally that is the same year that IR started making kayaking gear. I have worn a lot of different things in that time. I started out in slalom racing and then moved to freestyle kayaking. Most recently I have been moving back toward racing and starting to dabble in sea kayaking. I have not worn any other dry top or dry suit that fit me the way the 7 figure does. It is cut to perfection. It leaves me so free to move that I forget I’m wearing it and yet it doesn’t have all the baggy extra material of other tops I’ve had in the past. I used to get my dry top and dry suit a size up to be sure to have room for layering and movement, but I ended up with a bunch of extra bagginess that felt like a sail when I was swimming. With the 7 Figure I don’t have that problem any more. It doesn’t matter if i’m play boating, creeking, or looking for whales off the coast, the 7 Figure moves with me and never gets in my way.

Customer Service, Repairs, and Warranty

Warranty. Everyone wants to know about warranty. We will spend twenty to thirty thousand dollars on a car that only comes with a 36 month limited warranty, but if we are going to spend $800 on a piece of gear for our recreation time we want to know that it is going to out live us. IR has an industry leading warranty but we don’t seem to know about it. They guarantee their product against defects in the material and the craftsmanship for life. Now lets be fair and dive into the details of what that means a little. If a seam starts to come unstitched, that is a defect in craftsmanship and it will be fixed. If you fall down a hill at the put in and tear your dry top, that is not a defect. Not to worry though, IR will repair this kind of accidental damage at a very reasonable cost. Their customer service is the best I’ve seen anywhere. When you contact them you can rest assured that the person on the other end is a kayaker and knows exactly what you are talking about. They use this same gear themselves. I bought my first Lucky Charm skirt when they first came out. After having it for a couple years and wearing it on the river around 500 times the deck started to get little holes and it wasn’t so dry any more. I got on the instant message service on the Immersion Research web site and told them what was happening and asked what they could do. They had me send in the skirt. They patched the deck with some neoprene and sent it back to me. The whole process took 10-14 days maybe and I think it cost between $20 and $30. I got another 300 – 400 days out of that skirt before finally retiring it. Can you guess what skirt I got next? If you guessed another IR you’re right. I’m now using the new royal and loving it. A few weeks ago I paddled 6 laps on the NF Feather and didn’t have one sponge worth of water in my boat the whole day. I know from experience that I’m gonna get a lot of days out of this skirt and when it finally does wear out IR is going to be there to help me extend its life a little further.

Please leave a comment and share your thoughts about Immersion Research gear. Good, bad, or indifferent we want to know what you think.

Cheers,

Pete

Posted in Uncategorized | Leave a comment

Custom Stern Mount for GoPro

Ok, I’m going to show you how to build a custom stern mount for your GoPro. This is a great angle to get some video from. It allows you, the paddler to be seen and your hands won’t keep blocking the shot. But first, I want to acknowledge that there is some risk in putting this on your kayak. Only you can decide how much risk is acceptable for you and if you do choose to build one of these you do so at your own peril. Ok, now my disclaimer is out of the way lets get down to business.

First lets look at what you need. This should be pretty affordable. I spent less than $5 on PVC but I already had the glue. The most expensive part is going to be the handle bar mount from GoPro. Here is what you need to get from the hardware store.

  •    a few feet of 3/4 in pvc tube
  •  1 3/4 in. male adapter
  •  1 3/4 in. tee with a female threaded middle connection
  •  2 3/4 in 90 deg. elbows
  •  2 3/4 in. to 1/2 in. reducers
  •  2 1/2 in. plugs
  •  1 foam pool noodle
  •  1 cheap carabiner
  •  tent guy line or other small diameter string to secure your camera

You will also need a hack saw, a drill, and some PVC Glue.

Step One:

Remove stern grab handle and screw plugs onto the boat using factory screws. You may need to drill holes in the plugs first.

Step Two:

Put reducer bushings on plugs

Step Three:

Put elbows on bushings.

Step Four:

Check the fit of the tee between the elbows. If necessary trim the elbows and/or tee with saw. After you trim them recheck the fit.

Step Five:

Cut 3/4 in. tube to connect the elbows to the tee.

Step Six:

Remove cat from kayak.

Step Seven:

Connect both elbows to tee and slide elbows onto plugs. Push all the way down onto the plugs. If it is tight that is good. If it’s real easy you may want to wrap a thin tape around the plugs to make a snug fit. This will be held on by friction. It is designed to come off if it gets hung up on something.

Step Eight:

Screw in male adapter

Step Nine:

Cut tube to about 2.5 feet or so it is roughly head height when you are in your kayak. Then slide the pool noodle onto the tube.

Step Ten:

Put the tube onto the adapter and connect the whole thing to the kayak. Set the angle of the tube how you like. I set mine so that the camera is about even with the end of the kayak. Make some marks on the tee and the elbows once you have it where you like so you know where to put them.  Once you have the angle you want remove the mount from the boat and glue the pvc connections together. DO NOT GLUE THE PIECE SHOWN BELOW TO THE THE TWO REDUCERS THAT YOU SCREWED TO YOUR BOAT.

Step Eleven:

Once the glue is dried drill a hole in the bottom of the tee and run your tether through the tube and out the top.

Step Twelve:

Screw the tube onto the tee, put the tee onto the boat, and attach the GoPro handle bar mount to the tube. Connect your tether to a rescue point on your boat.  You are ready to film.

stern mount

This design is intended to pop off the boat if you get hung up. If if comes off too easily you may want to wrap tape around the plugs attached to your boat to make them fit tighter. When it comes off the noodle will keep it afloat. I use a cheap carabiner so that if it’s dragging behind me and gets caught the carabiner will break. Also, I recommend attaching your tether directly to the GoPro for maximum security. I hope you find this design useful and instructions helpful. Let me know what modifications you come up with in the comment section.

Posted in Uncategorized | 7 Comments

Break Out Your Break Down

How To Quickly and Easily Store a Break Down Paddle in your Kayak

People typically think of needing a break down paddle when someone in the group breaks his or her paddle, but what if somebody just loses a paddle? We have all been on the river and seen someone swim. People are going all different ways chasing the swimmer, the boat, the dry bag that came out, but what about the paddle? The paddle is one of the hardest things to spot floating through a rapid and can be easily lost. Suppose it was you that lost or broke your paddle. “My friend has a break down,” you think to yourself feeling relieved. Then your friend hands you a paddle with a blade twice the size of what you normally use and it’s 10 cm longer with a 60 degree offset. Now what?

What Kind of Break Down Paddle Should You Get?

What kind of paddle do you normally use? Your break down paddle should be a 4 piece version of that same paddle. For example if you use a Werner Shogun that’s 200 cm long with a 30 degree offset, your break down paddle should be a powerhouse that’s 200 cm long with a 30 degree offset. (The shogun is the foam core version of the powerhouse and the stikine is a foam core version of the sherpa. The blade shape and size is the same. I don’t know if you can get foam core break downs but you probably don’t want to because that would be expensive.) I know paddles aren’t cheap and break down paddles are no exception but unlike your primary paddle your break down paddle will see very little use (hopefully), so it will last pretty much forever. You only have to buy it once and trust me, a break down paddle is one piece of gear you will be really glad you have if you ever need it.

When Should You Carry Your Break Down Paddle?

Answer these two questions…. Can I walk back to my car if I lose my paddle? Do I want to hand paddle, bare handed not with hand paddles, the rest of the run if I lose my paddle? If you answered no to both of these questions you should take a break down paddle with you.

How Do You Store A Break Down Paddle?

the river store, break down paddle, kayak

Ok, so now you have a break down paddle. How do you store it in your kayak? There are as many ways as there are paddles to choose from. Here is one method that I use pretty often that is simple and easy to do. First make sure there is nothing in the back of your kayak. I like to to store my paddle in two pieces but depending on the length of your boat and the length of your paddle you may need to put the the blade and half of the shaft in separately and then connect them once they are in your kayak. Most modern creek boats and river runners should have room for half of a paddle, but depending on your seat height and the stern rocker and a number of other factors you might not be able to get it in with the blade connected to the shaft. If this happens take the blade off.

the river store, break down paddle, kayak

Put the shaft in first and then the blade. Once both pieces are in, align the blade to the shaft and reconnect them. Make sure you can reach the lock button. If you have to put the paddle in one piece at a time you will most likely need to get it out the same way. If you can’t reach the lock button you won’t be able to get the paddle back out.  Once you have both pieces in, one of each side of the pillar, put your float bags in on top of the paddle halves.  I like to use the NRS rodeo floats in my creek boat. If you push the bags all the way to the end of the kayak, you still have room for a dry bag in front of them after they are fully inflated.  Once you have your bags in and pushed all the way back simply blow them up as tight as you can. The bag will hold the paddle tight to the floor of the kayak keeping it securely in place.

the river store, break down paddle, kayakOnce your paddle is stored in your kayak you can just leave it there so you don’t have to remember to pack it each time. It will be there when you need it. I’ve been carrying my break down like this for a couple years now and it seems to work really well. If you have any other tricks that have worked for you please feel free to share them in the comments section. Thanks for reading.

See You On The River

Pete

Posted in Uncategorized | Tagged , , , , , , | 5 Comments

Top 5 Pieces of Gear You Should Have in Your PFD

There is a wide variety of PFD’s available for the river today. Many of them come with all kinds of pockets to store all sorts of goodies in, but what should you pack in these pockets? You want to have the essentials for sure, but you also want to avoid stuffing your pockets with unnecessary weight to carry around. Here is some of the gear  I make sure to always have in my PFD.

Top Five Gear Items to Carry in Your PFD

1. Whistle

This should be a no brainer. If you don’t have a whistle in your PFD, get one. They’re cheap, and often free. This doesn’t need to be anything fancy. You can get one at the dollar store if you want. There is some etiquette to be considered here though. As with most rescue gear you want to use it when you need to but don’t do so lightly. I know some rescue courses teach three long whistles means “help!” and anything else is a signal. In a lot of other areas any whistle blast means there is an emergency. If something is really wrong you may not be able to get three blasts out. Be mindful who is around before using your whistle. You may inadvertently cause someone a moment of panic when you blow a whistle to get their attention and they think you’re drowning. Best thing to do here is talk about signals with your group before you put on to make sure you are all on the same page. Especially if you don’t know each other well. Also, make sure you keep in somewhere you can get to it. If you’re in trouble you don’t want to have to dig into the little pocket inside the big pocket and look under your sunscreen and cliff bars to find it. I like to keep mine attached to the shoulder strap of my PFD where I can reach it with my teeth if my hands are busy.

2. Pin Kit

If you’re unsure how to use a pin kit, don’t carry one because it won’t be any good. You should get familiar with them first and then keep one on your person. Don’t keep it in your boat. If your boat is the one pinned and you’re the only one with a pin kit you’re are hosed. Instead pack it in your PFD so it is always on your person. Your kit should contain at least 3 carabiners, about 12 ft of webbing, and a prussic. Pulleys are optional but not necessary. It is popular to wrap the webbing around your waist and secure it with a carabiner. Personally I don’t like this. The webbing has potential to catch on something and isn’t on a quick release. I think it is better to pack it in your PFD. You will have to choose for yourself what risks you are willing to accept.  Make sure you take your kit out from time to time and practice setting it up. It is important to be able to so quickly.

3. Chapstick

Your lips will thank you. We usually remember sunscreen for our face and neck but don’t forget the lips. This is my most used gear item in my PFD for sure.

4. Spot Rescue Beacon

These GPS beacons are becoming more popular. They cost about $100 to buy and $100 per year for the service. I’ve had mine for 3 years now and it has already paid for itself. It can send your GPS coordinates to search and rescue at the press of a button but my favorite feature is the “OK” message. I was on a 2 night trip that turned into a three night trip on the last day. We had no cell service down in the river canyon of coarse, but I was able to use SPOT to send a message to wife to let her know we were OK but going to be home later than planned. (To read more about this adventure, click here.) I highly recommend the SPOT to anyone. Just remember like with the rest of your emergency gear, don’t get too trigger happy with it. You don’t need to be calling a helicopter every time you stub your toe but when you really do need medevac this tool is invaluable.

5. Snacks

I try to keep a little food in my PFD at all times as well. You can pack your lunch in your dry bag but keep something quick, small, and high energy close to you. You may get hungry or need a boost at a random time that isn’t convenient to stop and dig out your dry bag. I like to keep Gu energy gel on hand or something similar. If you or someone in your group has just taken their third swim of the day a quick pick me up like Gu or Honey Stingers can be like a gift from heaven.


So these are a few of the main things I always keep on me while on the water. Let me know in the comments section what other things you like to be sure to have when you’re out boating.


Cheers

Pete

Posted in Uncategorized | Tagged , , , , | Leave a comment